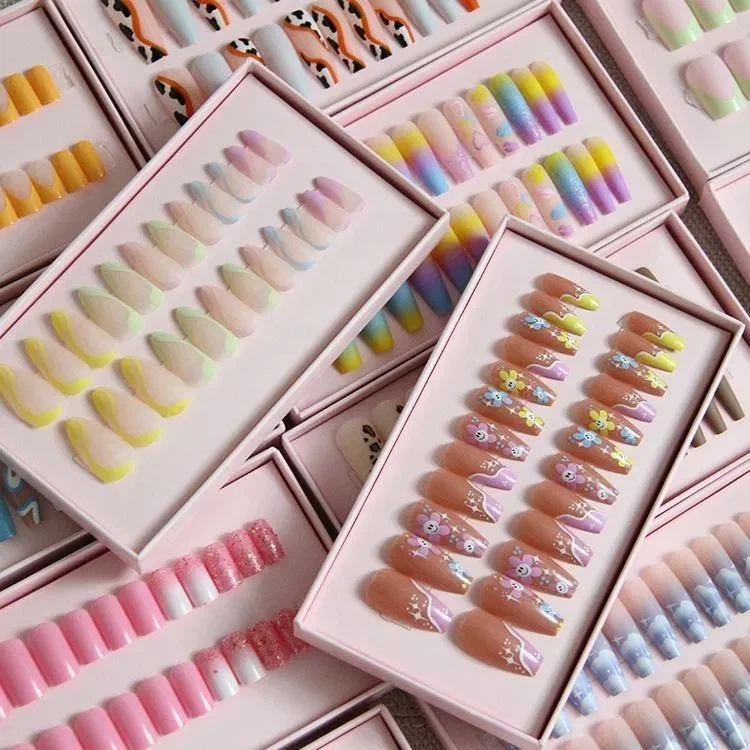
Ballerina Handmade Press-on Nails
Handmade press on nails, also known as glue on nails, were super popular in the late 90's/early 00's. They are artificial, acrylic nails that are already made up; the client simply has to glue them onto the top of their natural nail.Handmade press on nails are artificial acrylic nails that have already been made up ready to stick to the natural nail. Depending on the quality of the nail, they can last up to 2 weeks on the nail.If applied correctly, they can look and feel just like acrylic nails.They come in all shapes (coffin, almond, square, stiletto etc) and sizes (short, medium, long) and come in all colours and nail designs.
Advantages of Ballerina Handmade Press-On Nails
Press On Nails Do Not Harm Our Natural Nails
They are a healthier alternative to acrylic nails. It's much better for your nail bed. They are super easy to remove without causing any nail damage.
Press On Nails Are Convenient And Affordable
They are super easy to apply. Only in 10 minutes you can get salon-like nails. My favorite thing about press on nails is the wide variety of designs I can choose from and change nail style more often.
Press On Nails Can Be Reuse Again And Again
Even though press on nails can last weeks with proper care, better yet, they can be reused again and again if you use apply press on nails with adhesive tabs.
Temporary Enhancement
Press-on nails provide a temporary fashion upgrade, showcasing the versatility of nail styles to match one's mood. In contrast to extensions, which demand constant maintenance and limit style changes to maintain nail shape, press-on nails provide a convenient and temporary enhancement. You can switch up your nail look without committing to a specific style for an extended period. In contrast, the press-on nails gives you the opportunity to change the look of your manicure as required.


-
![Snowman-3D-Long Ballerina-Press On Nails]() Snowman-3D-Long Ballerina-Press On Nails
Snowman-3D-Long Ballerina-Press On NailsThe nail tips have a winter/holiday theme, featuring snowmen, snowflakes, and other wintry motifs in shades of blue and white. these nail designs seamlessly blend whimsical, wintry elements with...
-
![Silver Flame-Dimond-Long Ballerina-Press On Nails]() Silver Flame-Dimond-Long Ballerina-Press On Nails
Silver Flame-Dimond-Long Ballerina-Press On NailsThe nails have a nude or pale pink base color, with intricate silver glitter and crystal embellishments along the lengths of the nails. The overall aesthetic is very glamorous, eye-catching, and...
-
![Rainbow Color-Geometrical Shape-Ballerina-Press On Nails]() Rainbow Color-Geometrical Shape-Ballerina-Press On Nails
Rainbow Color-Geometrical Shape-Ballerina-Press On NailsThis nail art showcases a contemporary, fashion-forward style that blends vivid hues and modern geometric patterns to create a unique and visually captivating look. The design would be well-suited...
-
![Purple Butterfly-French-Medium Ballerina-Press On Nails]() Purple Butterfly-French-Medium Ballerina-Press On Nails
Purple Butterfly-French-Medium Ballerina-Press On NailsThe central design features a butterfly motif, with sweeping strokes of purple and black paint creating a dynamic, fluid effect across the nails. The patterns have a sense of movement and energy,...
-
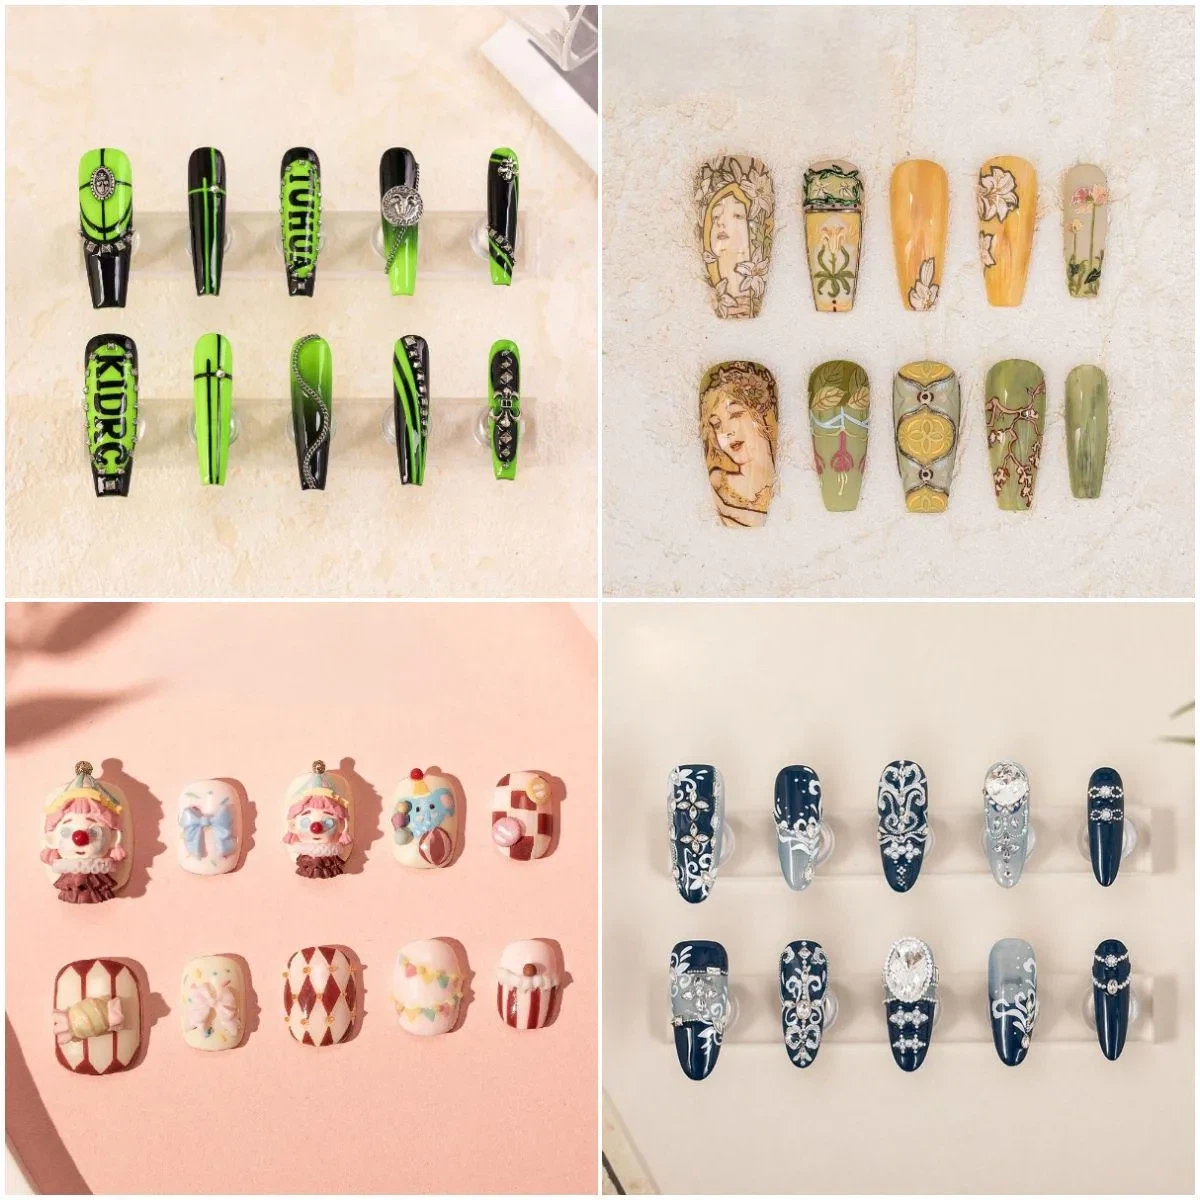
![Punk Style-Black-Long Ballerina-Press On Nails]() Punk Style-Black-Long Ballerina-Press On Nails
Punk Style-Black-Long Ballerina-Press On NailsThis is a set of artificial nail tips or extensions with a combination of black and nude/beige color tones. The designs feature various geometric patterns, swirls, and embellishments such as...
-
![Dangerous Romance-Lacquer-Long Ballerina-Press On Nails]() Dangerous Romance-Lacquer-Long Ballerina-Press On Nails
Dangerous Romance-Lacquer-Long Ballerina-Press On NailsThe nails feature a striking black, white, and pink color scheme with a dynamic, abstract striped pattern. The contrasting colors and bold graphic patterns create a visually impactful and...
-
![Dancinng Ribbons-Hand Painted-Blue and Silver-Long Ballerina-Press On Nails]() Dancinng Ribbons-Hand Painted-Blue and Silver-Long Baller...
Dancinng Ribbons-Hand Painted-Blue and Silver-Long Baller...The nail designs exhibit a bold, minimalist aesthetic with a striking, modern sensibility. The monochromatic gray and white color scheme creates a sophisticated, understated look, while the...
-
![Colors Of Rainbow-Hand Painted-Long Ballerina-Press On Nails]() Colors Of Rainbow-Hand Painted-Long Ballerina-Press On Nails
Colors Of Rainbow-Hand Painted-Long Ballerina-Press On NailsThese nail designs present a maximalist, retro-inspired aesthetic that celebrates bold self-expression, creative individuality, and a fusion of vintage and contemporary design influences. This...
-
![Colorful Jelly Beans-Gold-Metallic-Long Ballerina--Press On Nails]() Colorful Jelly Beans-Gold-Metallic-Long Ballerina--Press ...
Colorful Jelly Beans-Gold-Metallic-Long Ballerina--Press ...The nail designs in this image have a distinct retro, pop art-inspired aesthetic. The bold, vibrant color palette and asymmetrical placement of the varied gemstone-like embellishments create a...
-
![Blue Magic-3D-Long Ballerina-Press On Nails]() Blue Magic-3D-Long Ballerina-Press On Nails
Blue Magic-3D-Long Ballerina-Press On NailsThe combination of the moody color scheme, textural elements, metal hardware, and angular nail shape gives these designs a distinctly dark, rebellious, and subversive character. This nail art...
-
![Abstract Mermaid Tail-Light Purple-Ballerina-Press On Nails]() Abstract Mermaid Tail-Light Purple-Ballerina-Press On Nails
Abstract Mermaid Tail-Light Purple-Ballerina-Press On NailsThe nail art showcases an intricate, visually striking design using a cool-toned color palette and creative techniques like the marble patterning and metallic accents. The end result has a chic,...

