Stiletto Handmade Press-on Nails

What is Stiletto Handmade Press-On Nails


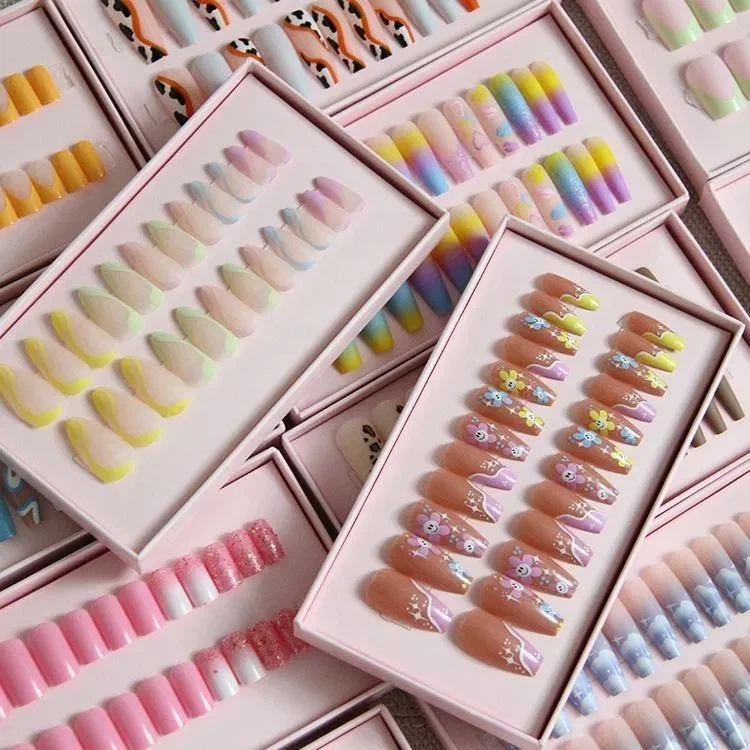
Press on nails are artificial nails that “press” onto your natural nails.There are two kinds: peel-and-press and glue-on. Both can easily be applied in minutes at home to get salon-like results. They come in a variety of styles and colors, like chrome and aura nails, which are trending this season .They're perfect for recovery after you've taken your gels or acrylics off. Press ons allow weak nails to be protected, They are also convenient for achieving a beautiful manicure quickly and easily.And of course, press on nails saves time from commuting to the salon, they don't chip or lose shine, are affordable, and make it easy to switch up your look to match any outfit.


Advantages of Stiletto Handmade Press-On Nails


Durability: One of the key advantages of our handmade press-on nails is their durability. Unlike factory-made alternatives, our nails are crafted to last. They are strong, resilient, and can withstand daily activities without chipping or breaking. This longevity means you won't need to replace them as frequently, further reducing waste.


Quick and Easy Application: Press-on nails are incredibly easy to apply, making them a perfect addition to your self-care routine. Unlike traditional manicures that can take hours, press-on nails can be applied in minutes. This quick application process allows you to enjoy beautiful nails without spending excessive time or money at the salon.


Flexible and Portable: Press-on nails are a flexible self-care option that you can enjoy anytime, anywhere. Whether you're at home, traveling, or even at the office, you can easily apply or change your nails to suit your mood and style. This portability makes press-on nails an ideal self-care tool for busy individuals.


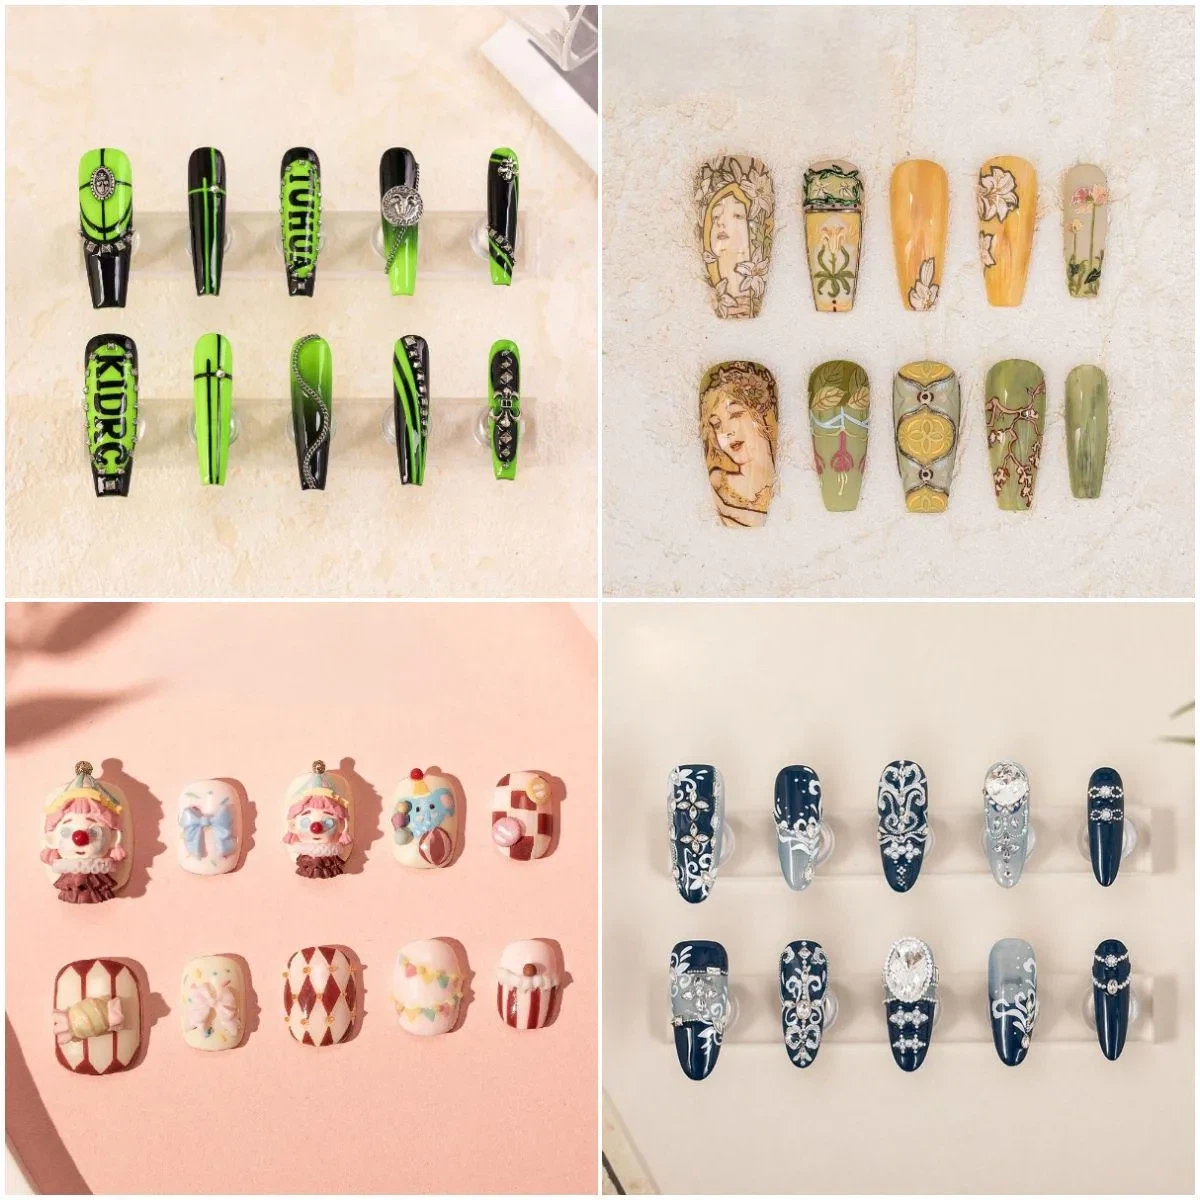
Variety : One of the best things about press-on nails is the variety of designs available. From classic French tips to bold, artistic patterns, there's a press-on nail design for every occasion and personality. Handmade press-on nails offer a wide range of styles to help you express your unique sense of beauty.

Why Choose Us


Our Factory
Starting from 2024, in order to meet the production needs of the industry, Donghai County will organize towns to make rational use of existing vacant land and provide a certain number of quotas, which is expected to provide jobs for 20,000 people to earn a decent income. In addition, Donghai County will also build a production base in the High-tech Zone. Donghai County has 60,000 square meters of modern standard factory buildings and is determined to attract and introduce at least 30 supporting enterprises such as nail accessories, consumables, and packaging to settle in.


Dual Guarantee Of Efficiency And Quality
Unlimited to the manufacturing link, Donghai has built a comprehensive and integrated industrial chain from design, material selection, production to sales and after-sales service. This vertical integration model enables us to control every link more closely to ensure the quality and consistency of the product.


Personalized Customization To Meet Diverse Needs
We know that every customer's pursuit of beauty is unique, so we provide a full range of customized hand-made wear-on nail services. Our professional team of designers and experienced craftsmen work closely together to carefully create each wear-on nail according to your personalized requirements. From the shape, length, pattern of the nails to the details and color matching of the decoration, every element can be customized according to your preferences, allowing you to show your unique charm.


Favorable Price, High Cost Performance
Through perfect industrial chain management and cost control, we are able to provide more competitive prices while ensuring product quality. We believe that high-quality products should not be constrained by high prices. Therefore, we are committed to providing customers with cost-effective hand-made press-on nail products, making beauty within reac.


How to Apply a Flawless Press on Nail Manicure
Y2K-Chrome Silver-Cat Eye-Stiletto-Press On Nails
Nebula-3D-Hand Painted-Cat Eye-Stiletto-Press On Nails
Glamourous Boldness-Shimmering-Stiletto-Press On Nails
Golden Snowflake-Shimmer-Long Almond

Clean & prep
Once you have your press ons picked out and ready to go, all there's left to do is... Take care of your own nails. It all starts with a well-prepped foundation. There is no use acing all of the other steps if you start off with badly maintained nail beds.


Cuticles
Dry cuticles might not look entirely threatening to the process, but they definitely impact how well your press-on nails with attach to your natural nail bed.
Use a cuticle remover, nippers, or a nail brush to gently exfoliate and remove any build-up dead skin. While you can definitely take care of this in one go, we recommend you focus on the regular maintenance of your cuticles for the best result. In each press on nail kit, we include a cuticle stick that is gentle enough to push back your cuticles without creating any damage to your nail bed.


Clip
While we recommend you to file your nails regularly to avoid clipping, we can't always refrain from having to cut down on a lot of length when applying certain shapes or lengths of press on nails. The main purpose of filing and or cutting down your natural nails is so that your nails don't show out from underneath the press on, which helps the press ons look as natural as possible.
Carefully clip your nails to the appropriate length (based on personal preference and your chosen press on nails). Make sure not to go too short, as this can be painful and hurt your skin.


File and buff
Whether or not you clip your nails first, filing your nails is an absolutely essential step - both for general natural nail health and to successfully apply your press ons. We don't want any snagging!

Take your nail file that comes in your kit (using the blue side) to simply file your nails in one single direction. This way, you will avoid snaggy nails and decrease the possibility of your nails breaking and cracking.

Next, gently buff up the surface of your natural nail with the pink side of the nail file included in your kit. Buffing your nails provides more grip for the glue to adhere, which gives you longer lasting results and wear time. But, if you only plan on wearing your press ons for 3-5 days, we recommend you skip this step.


Use an alcohol prep pad
When it comes to maintaining healthy natural nails, we know acetone and alcohol-based products can get a bad rap - and with good reason. Just like our skin, our nails need to be properly hydrated regularly in order to thrive. This means both cuticle oil and nail oils should be a part of your nail health routine, whereas drying astringents like alcohol should not... But there are exceptions.

Use a cotton pad to rub a small amount of alcohol on the surface of your whole nail, ensuring the removal of any oils or dirt that can stand in the way of the nail glue. We recommend stocking up on some alcohol prep pads to add to your at-home nail care essentials kit. This step is crucial and cannot be skipped when applying press-ons. We always need to ensure the cleanest possible surface, which leads to the most firm application of our nails.
In other words, we are all about natural nail health, meaning we will always tell you to properly hydrate and protect your nails! When applying press on nails, however, a little bit of alcohol or a drying agent such as acetone can go a long way when utilized properly. Of course, don't forget to always rehydrate your nails in between applications! Keeping a healthy balance is the answer.


Apply the glue
Just like you would a top coat or any nail polish, apply an even layer of glue to your nail bed. Make sure to get all of the corners, too! You don't want to have your nail glued on crooked and compromise your manicure.
As an alternative, feel free to place the glue directly on the back of the nailuxe nail, focusing more glue towards the base. You may find that you have more control, facilitating a more even application.
Remember, a single, even layer is all you need! If you do end up over-gluing, immediately wipe any excess glue you see. The glue dries very quickly so you have to do this as soon as any glue starts to spill out. If you follow all of the previous steps correctly, there's no going wrong! Try out both ways of applying the glue and see what works best for you.

Align your press-on nails with your natural nails
It's finally time to apply! Be quick with this process - you don't want your nail glue to dry out before you get a chance to place your press-on.
When applying, make sure to properly align your press on nails with the bottom and sides of your own nails. Take your time before applying the glue to practice doing this efficiently! We don't want the glue to dry out, and we definitely don't want to have to remove our press on nail once it's attached.
Pro tip: When gluing, align the press on as close to the cuticle line as possible. Then, apply at a 45-degree angle in a slow controlled motion with even pressure. This will help ensure that there are no air pockets or bubbles trapped underneath the nail!


Hold
Once it's on there, apply even pressure to the entire nail in order to properly bond your press-on nails. Press down on your nails for about 15-20 or more seconds to ensure that they are glued properly. This simple step will make sure you press on nails last for longer and are more comfortable on your finger.
Pro tip: To ensure your nails last as long as possible, stay away from water for at least the first 2 hours after application. We suggest the best time to apply press ons is in the evening after your bath or shower (your cuticles will be softer and easier to push back too)!


Press-On Nails Have All Varities


Just like the styles and shapes of press-on nails, there are also wide varieties of press-on nails available in the market. These varieties include:


3D Embellished Press-On Nails: 3D embellished press-on nails feature intricate decorations, such as beads, jewels, charms, or other embellishments, which add texture and dimension to your nails. They are unique, eye-catching, and perfect for special occasions.


Glitter or Metallic Press-On Nails: Glitter or metallic press-on nails are perfect for those who love a touch of sparkle and shine. These come in various glitter or metallic finishes, adding a dazzling and glamorous look to your nails.


Nude or Natural Press-On Nails: Nude or natural press-on nails come in different shades of beige, taupe, and brown. They are subtle and understated, perfect for everyday wear. When you apply these nails it doesn't make your manicure look artificial or over the top.


Patterned Press-On Nails: Patterned press-on nails come in a wide range of designs and patterns, from floral to geometric. They are fun and bold, great for everyday wear or special occasions. You can choose our Fashionista, Couture, Unicorn, or Sequins as these are some of our bestselling and fun designs for teens.


French Tip Press-On Nails: These press-on nails mimic the classic French manicure, with a natural-looking pink or nude base and a white tip. They give you an elegant and timeless, perfect for a sophisticated and polished office look.


How to Choose the Right Size Press on Nails


Method
By far, the easiest way to get your exact sizing with press on nails, is to buy a sample sizing kit. The sizing kits come with all 10 sizes available for press on nails. With this method, you can just place each press on nail on each of your nails until you find the one that fits the best. As you do this, write down your number for each nail from thumb to pinky. Those are the custom sizes you will enter (in order from thumb to pinky) when purchasing your press on nail sets. If you find that your numbers are exactly the same as one of the presets shown above, then you can choose from the size drop down choices of xs, s, m, l or xl when ordering your set.


Method
Place a piece of clear tape across the top of your nail and draw a line with your pen on the crease on both sides of your nail. Make sure you find the widest part of your nail to make your markings. Then take the tape and place it on the centimeter ruler. Count the number of lines on the ruler from one marking to the next (don't worry about the actual numbers showing on the ruler). This will give you the millimeters measurement you need to reference with the finger chart above.
For example, let's say you measured your thumb and counted 16 lines from one marking to the next, that would mean your measurement was 16mm. If you look at the chart, you can see the number size for that measurement, 16mm, is “1”. This means your thumb is a size 1. You will repeat this process for every finger.


Method
This method works for those that happen to have a fabric measuring tape. The fabric measuring tape is the one used mostly by a seamstress for body measurements, so they wrap around very easily. You will be using the centimeter side of the measuring tape. Now, you can use the measuring tape to do the same thing you did above with the clear tape. This method is a lot faster than method 1. You can just count the lines from one edge of your nail to the other and this will give you the millimeter measurement that corresponds to the nail chart.


Blue Magic-3D-Long Ballerina-Press On Nails


How to Store Press-On Nails

The idea is to store them properly in a cool and dry place away from direct sunlight. You need to protect them from bending or breakages and also need to save them from fading or chipping. You can either invest in a good-quality storage container or opt for DIYing your own organizer. Just be sure you are sorting and storing them in an organized manner so you can locate them later on with ease.


Having said that, just getting a container to store your nails only to throw them all together in a sea of designs will do more harm than good. All your tips, old and new, will be in it and it will be even more exhausting to search for designs that are made to be worn together. You will waste more time and energy and it will also destroy your carefully curated babies. After all, you are not going to remember all your designs always and will not be able to choose the best one for your outfit to flaunt on your date night or your birthday party.


You either invest in a good-quality organizer specifically designed for storing your press-on nails or make one for yourself using any cardboard box. It should have a grid-like structure with individual dividers to sort and organize all your sets along with other nail supplies like nail glues, nail files, etc. It should have plenty of space for saving your press-ons from scratching each other and ruining the finish along with being airtight to avoid dust and buildup.


How Long Do Press-On Nails Last


Depending on the quality of the press-on nails and the correct application process, press-ons can be made to last for 10 days to two weeks. If you follow the correct procedure of applying the press-on nails, the glue will have a strong hold between the nail tip and your natural nail ultimately making the manicure last longer. Sometimes, the longevity of the application also depends on the growth and the strength of your natural nails but that isn't a constraint in case of using the press-ons. Besides, if you are not a person who'd be comfortable with fake nails or your work doesn't allow it, and are still using these nails for a specific occasion, you can get a fresh manicure for a few days and can remove the press-ons easily by following a few simple steps.


Plus you can store them correctly and reuse them which isn't the case when getting acrylics. And if you use the traditional nail polishes, they tend to dry out after a few uses especially if you don't use a good quality, which again isn't the case with press-on nails. If some of you are quirky and trend-obsessed or just love variations in your nails now and then, you can switch between nails for different occasions or regularly. 


FAQ

Q: How long do press-on nails last?

A: In general, you can expect your press-on nails to last about a week or two, depending on the type of nail and adhesive used. Press-on nails secured to your nailbed with glue will typically last longer than those held in place with adhesive nail stickers.

Q: How does press on nails work?

A: They come already painted and shaped, so all you have to do is glue them to your nails! You can buy cheap versions at your local pharmacy, and recently brands have started making more durable products with on-trend designs. They come in different lengths and shapes to suit everyone's tastes.

Q: Can I shower with press on nails?

A: Keep it short. A quick shower (after the initial waiting period) should not damage your nails, as long as you dry them thoroughly afterward. You can even go swimming with your press on nails on, but with a showers you need to be careful as hot water can loosen them.

Q: What to avoid with press-on nails?

A: To maximise the lifespan of your press-on nails, avoid prolonged exposure to water, apply a topcoat for extra protection, and be gentle with your nails to prevent lifting or breaking.

Q: Is it OK to get press on nails wet?

A: Once you've applied your press-on nails, you should avoid water for at least 2-3 hours after the application. Wait for a few hours for the glue to completely dry before you get your hands wet. Water and soap can break down the glue, so that your nails fall off sooner than you'd like.

Q: Why do press-on nails hurt?

A: This can happen because the artificial nails can cause mechanical stress on your natural nails. Don't worry, it's usually just a temporary reaction and not necessarily a sign of anything more serious.

Q: Do press-on nails ruin nails?

A: But if you are craving a set of long, faux tips, press-ons do tend to be gentler compared to gels and acrylics. The gel and acrylic processes can be very damaging to your nail beds, as they entail soaking in pure acetone and filing down the nail plate, which can weaken your nails over time.

Q: How to remove press on nails?

A: Soak them for about five minutes and check them regularly.On the flip side, if your press-on nails have a sticky adhesive backing, it's best to soak your nails in a bowl of warm, soapy water before removing them. This will help to loosen the adhesive.

Q: Is it better to size up or down in press on nails?

A: It's always better to size up than down so you can file away the edges for a better fit but can never add material back!

Q: How do you pick press on nails?

A: Well-fitting press-ons should fit comfortably, and should cover your entire nail bed. It should not fall short when fitting from side to side, but should also not fit so loose that it touches the skin.

As one of the leading stiletto handmade press-on nails manufacturers and suppliers in China, we warmly welcome you to wholesale custom made stiletto handmade press-on nails from our factory. All OEM&ODM products are with high quality and competitive price.

Take your business to the next level with support from DH Nails.
Feel free to contact DH Nails and access exclusive designs, reliable supply, and comprehensive support.