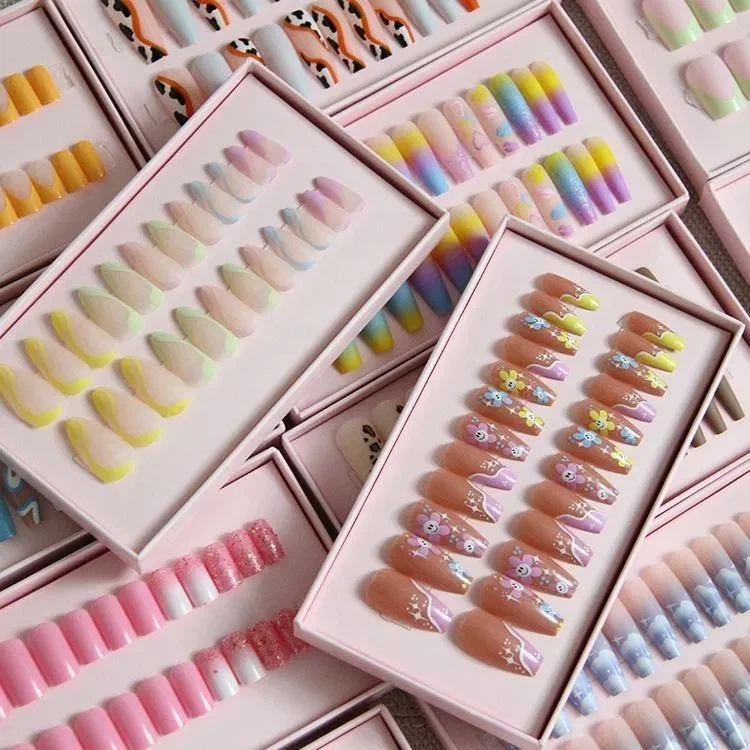
French Handmade Press-on Nails
Press-on nails are pre-designed artificial nails that can be quickly and easily applied to your natural nails using adhesive. They offer a convenient and affordable way to achieve a salon-quality manicure at home, available in a variety of shapes, sizes, colors, and patterns to suit any style. Perfect for temporary wear if applied with jelly tabs, or for longer-lasting wear up to 1-2 weeks with nail glue, press-on nails provide a quick solution for a flawless look without the commitment or expense of traditional manicures.
Advantages of French Handmade Press-On Nails
They don't damage your real natural nails
Your natural nails are in better condition under press on nails, the glue won't damage your nail skin and they are healthier compared to acrylic nails.
They are easy to apply
Press on nails is amazing as they are so easy to apply, all you need to do put a drop of glue at the tip and at the base of your natural nail and drop that nail right on top. After that press down on it firmly for a few seconds and wait until the glue is dry. Voila! That's all you need to do to have professional nails in a few minutes.
Press on nails don't damage easily and will always shine
The incredible thing about press on nails is that they won't damage as easily as other false nails. The nail is made of plastic but is strong and crafted to last long. Press on nails don't lose their finish either, they will continuously shine.


-
![Starfish-Silver Metallic-French-Ballerina-Press On Nails]() Starfish-Silver Metallic-French-Ballerina-Press On Nails
Starfish-Silver Metallic-French-Ballerina-Press On NailsThis is a set of manicured nails decorated with intricate nail art designs. The nails have a neutral beige color as the base, with metallic gold star-shaped embellishments adhered to the surface.
-
![Pure White Lace-Pearl-Short Almond-Press On Nails]() Pure White Lace-Pearl-Short Almond-Press On Nails
Pure White Lace-Pearl-Short Almond-Press On NailsA set of artificial nails in a pristine, elegant white color. The nails feature a variety of intricate designs and embellishments, including geometric patterns, floral accents pearl-like...
-
![Princess Snowwhite-French-Long Almond-Press On Nails]() Princess Snowwhite-French-Long Almond-Press On Nails
Princess Snowwhite-French-Long Almond-Press On NailsThe nails have a simple, elegant design. The nude and peach nail colors create a soft, understated look that is versatile and easy to pair with various outfits.
-
![Metallic-Silver-French-Short Almond-Press On Nails]() Metallic-Silver-French-Short Almond-Press On Nails
Metallic-Silver-French-Short Almond-Press On NailsThis is a set of false nails in a chrome or metallic silver finish. The nails have an interesting abstract, textured design that gives them a unique, modern look. The overall aesthetic has a...
-
![French-Sky Blue-Long Almond-Press On Nails]() French-Sky Blue-Long Almond-Press On Nails
French-Sky Blue-Long Almond-Press On NailsThis is a set of carefully manicured nails with a combination of light blue and nude shades. The nails have a sleek, elongated shape and a subtle iridescent finish. The nail style conveys a sense...
-
![French-Pink-Cat Eye-Long Ballerina-Press On Nails]() French-Pink-Cat Eye-Long Ballerina-Press On Nails
French-Pink-Cat Eye-Long Ballerina-Press On NailsThis is a set of artificial nail tips or extensions in a muted pink/gray color scheme. The nails have a refined, sophisticated look with an elongated, tapered "coffin" shape. The subtle iridescent...
-
![French-Cat Eye-Stiletto-Press On Nails]() French-Cat Eye-Stiletto-Press On Nails
French-Cat Eye-Stiletto-Press On NailsThe overall color palette is muted, consisting primarily of soft, neutral shades of pink and gray. This understated, monochromatic approach allows the natural texture and luminous finish of the...
-
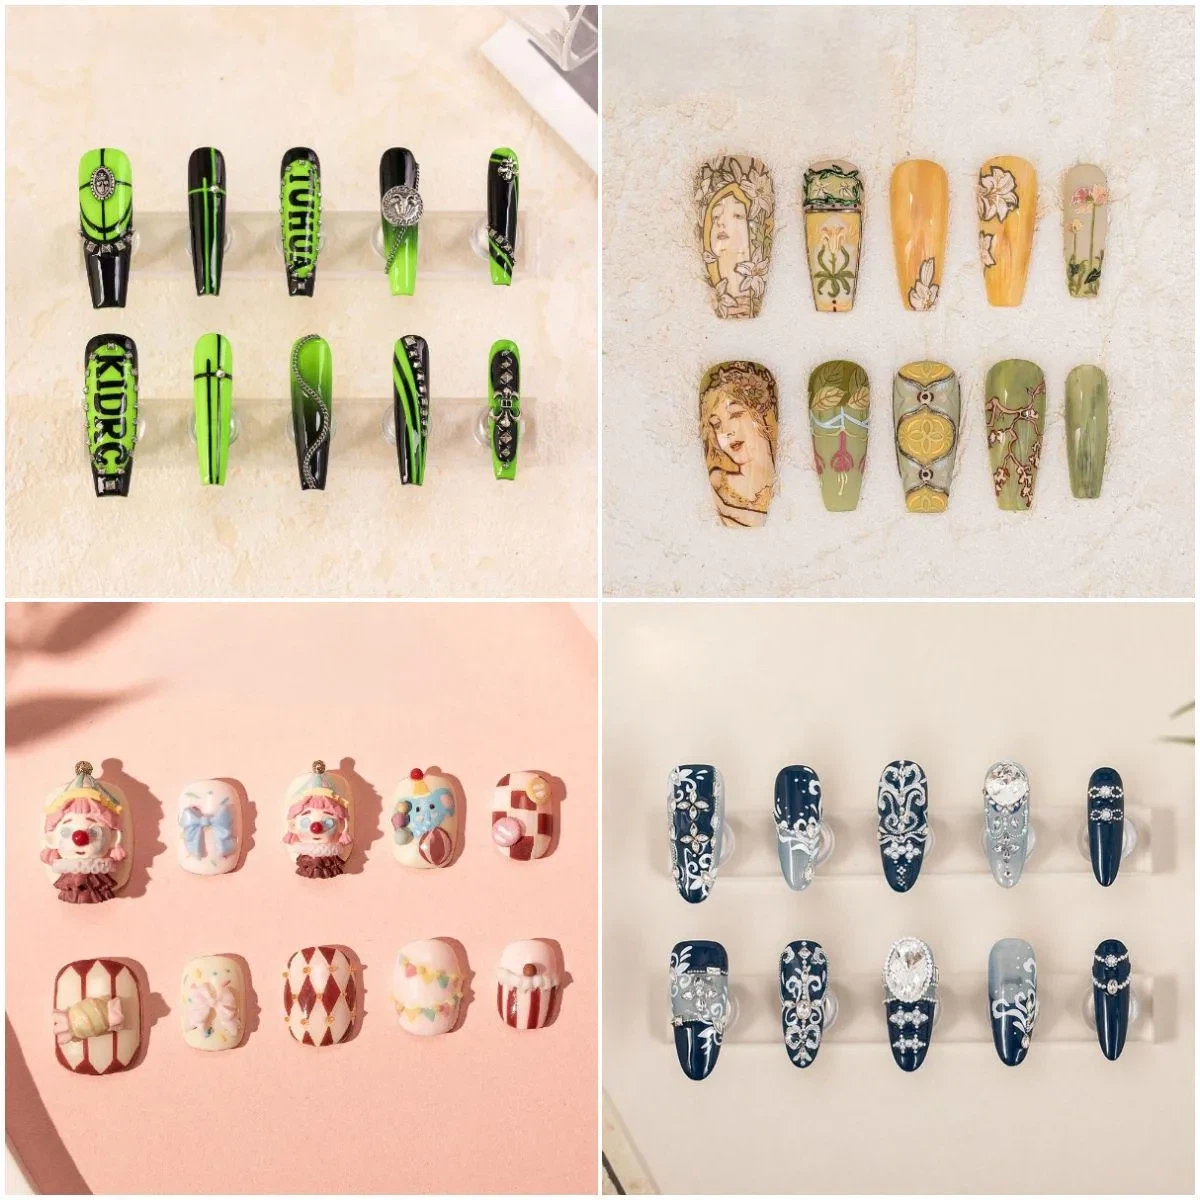
![French-Black and Green-Lacquer-Stiletto-Handmade Press On Nails]() French-Black and Green-Lacquer-Stiletto-Handmade Press On...
French-Black and Green-Lacquer-Stiletto-Handmade Press On...The unique blend of the dark, glossy base and the vibrant green accents gives these nails a futuristic, almost alien-like appearance. The overall design evokes a sense of dynamism and expressiveness.
-
![Classic-Gliding-French-Almond-Press On Nails]() Classic-Gliding-French-Almond-Press On Nails
Classic-Gliding-French-Almond-Press On NailsThe contrast between the muted nail color and the bold gold accents creates an eye-catching and distinctive look. This nail art style blends elements of minimalism and decorative elegance,...
-
![3D-French-Metallic-Stiletto-Press On Nails]() 3D-French-Metallic-Stiletto-Press On Nails
3D-French-Metallic-Stiletto-Press On NailsThe designs seamlessly blend futuristic, high-fashion sensibilities with a touch of magical realism, resulting in a truly innovative and captivating nail art collection.
-
![3D-Dimond-French-Stiletto-Press On Nails]() 3D-Dimond-French-Stiletto-Press On Nails
3D-Dimond-French-Stiletto-Press On NailsThis collection of nail art designs presents a highly imaginative, visually captivating, and dreamlike style. The combination of holographic finishes, vibrant embellishments, and fantastical...

